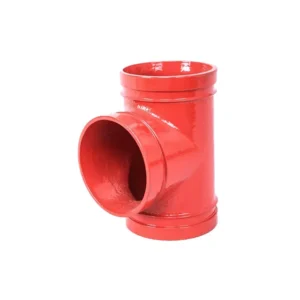
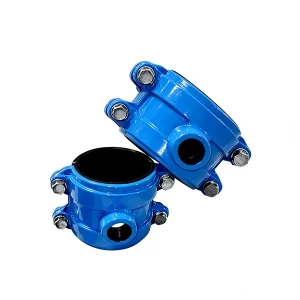
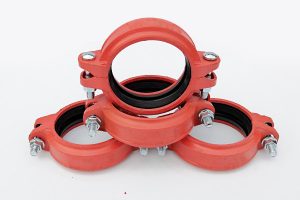
Installing a pipe saddle clamp is a simple and efficient way to create a branch connection without cutting or welding the main pipe. It is widely used in fire protection, water supply, and industrial piping systems.
If you are new to this fitting, you can first understand what a pipe saddle clamp is before starting the installation process.
Tools and Materials Required
Before installation, prepare the following tools and materials:
- Pipe saddle clamp
- Drill machine
- Hole saw or cutting tool
- Wrench or spanner
- Measuring tape
- Marker
Using the correct tools ensures accurate installation and prevents leakage.

Step-by-Step Installation Process
Step 1: Mark the Installation Position
Measure and mark the exact location on the pipe where the branch connection is required. Ensure the position is aligned with the system design.
Step 2: Drill the Hole
Use a drill machine to create an opening on the pipe. The hole size should match the outlet of the saddle clamp.
Make sure the hole edges are smooth to avoid damaging the gasket.
Step 3: Position the Saddle Clamp
Place the saddle clamp over the drilled hole. Ensure the outlet is correctly aligned with the opening.
Step 4: Install the Gasket
Insert the sealing gasket between the pipe and the saddle clamp. This ensures a tight and leak-free connection.
Step 5: Tighten the Bolts
Use a wrench to evenly tighten the bolts. Avoid over-tightening, as it may damage the gasket.
Step 6: Connect the Branch Pipe
After securing the saddle clamp, connect the branch pipe to the outlet. Make sure all connections are properly sealed.
For reliable performance in industrial and fire protection systems, it is important to choose a high-quality pipe saddle clamp that meets your system requirements.
Installation Tips and Best Practices
- Ensure the pipe surface is clean before installation
- Always use the correct gasket size
- Tighten bolts evenly to avoid leakage
- Test the system after installation
Following these practices helps improve long-term performance and safety.
Common Mistakes to Avoid
- Incorrect hole size
- Misalignment of the saddle clamp
- Over-tightening bolts
- Using low-quality materials
Avoiding these mistakes ensures a more secure and durable installation.
Conclusion
Installing a pipe saddle clamp is a straightforward process that can significantly improve efficiency in piping systems. By following the correct steps and using quality components, you can achieve a reliable and leak-free connection.
As part of modern piping solutions, pipe saddle clamps play an important role in flexible and efficient system design.